Mastering Navigation Bar in Swift
By Jono
Published on Jan 8, 2023 - Read Time: 5 min

I have seen a lot of confusion around the navigation bar in online forums and discussions. The navigation bar is an important part of many iOS apps, and in iOS 13 and above, there are several options available for customizing its appearance. In this article, we’ll look at how to change the background color, title text, multiple navigation bars in the navigation stack, and title text color of the navigation bar, and we’ll also discuss the UINavigationBarAppearance feature that makes it easier to apply custom appearance styles to different parts of the navigation bar.
Customize Single NavBar
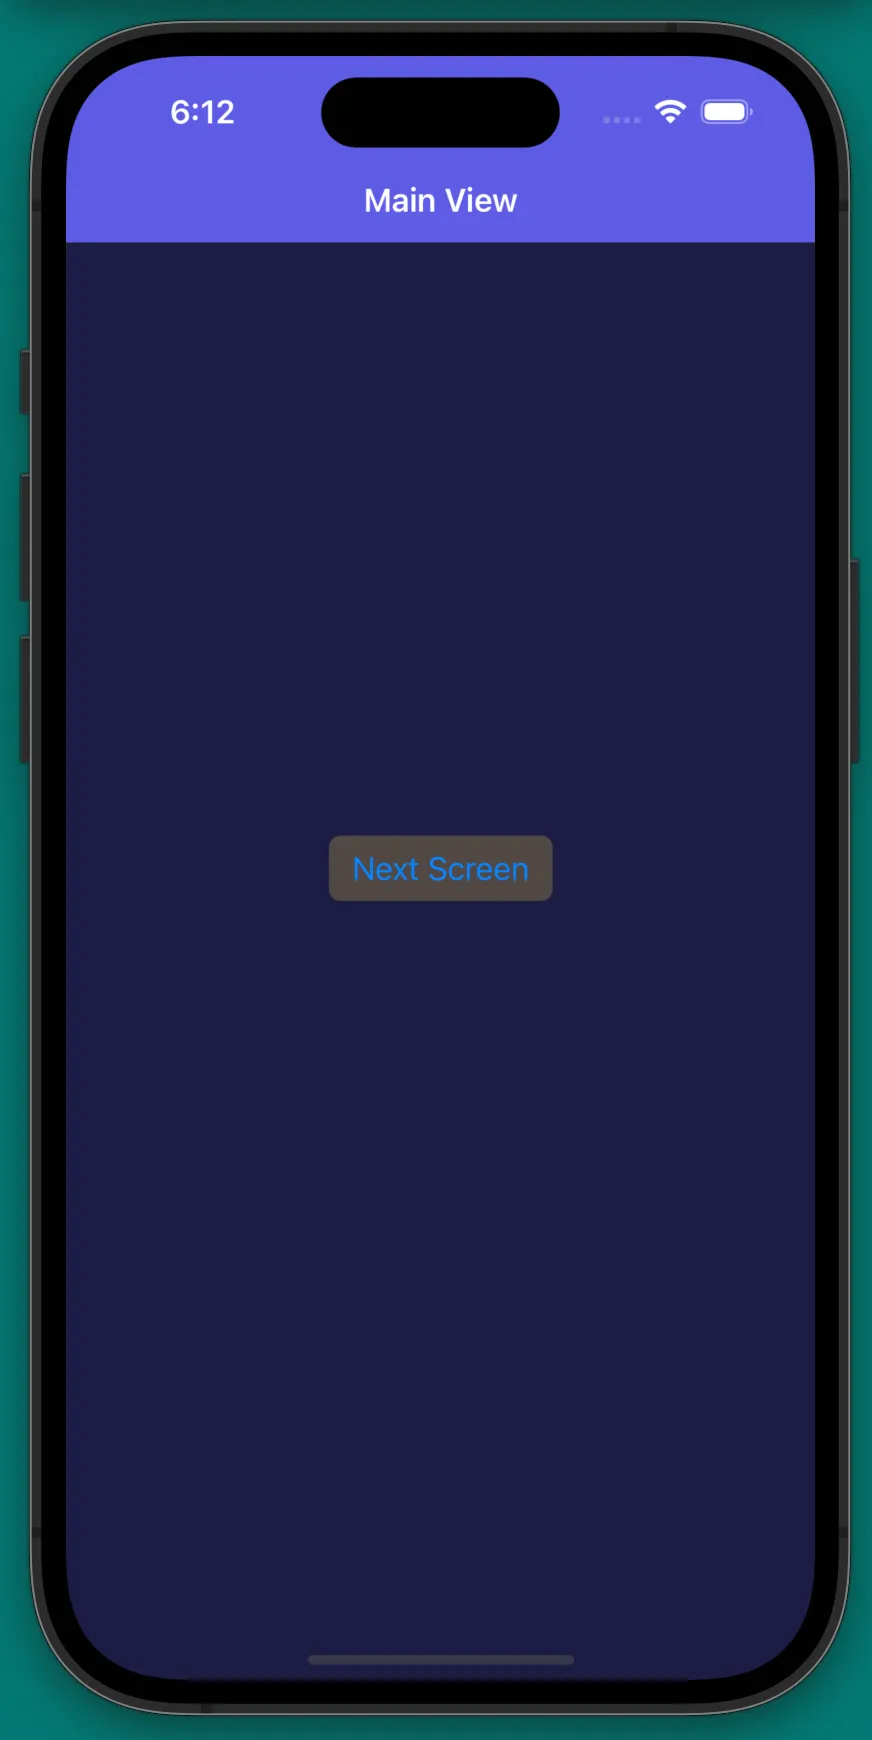
To customize the appearance of the navigation bar, you can modify the appearance of the view controller that contains the navigation bar in the StoryBoard or programmatically. Today we will only touch on the programmatic method. Here’s an example of how you might do to change the background of the NavigationBar:
class MainViewController: UIViewController {
    override func viewDidLoad() {
        super.viewDidLoad()

        // Providing title for navigation bar
        title = "Main View"
        // Initiate navbar, using this because, even though the view has been loaded, doesn't mean that the navigation is inserted into the view
        guard let navBar = navigationController?.navigationBar else {fatalError("Nav bar doesn't exit or has not been inserted yet")}

        let appearance = UINavigationBarAppearance()
        // Set the Background color to the color of your choice here
        appearance.backgroundColor = UIColor.systemIndigo
        // The appearance of the navigation bar when it is in its standard (non-scrolling) state.
        navBar.standardAppearance = appearance
        // Specifies the appearance of the navigation bar when it is scrolled under the top edge of the screen.
        navBar.scrollEdgeAppearance = appearance
    }
}
This code customizes the appearance of the navigation bar when the view controller is displayed. The
viewDidLoad() method is called when the view controller's view is loaded into memory; generally,
this is where we customize the appearance of the navigation bar.

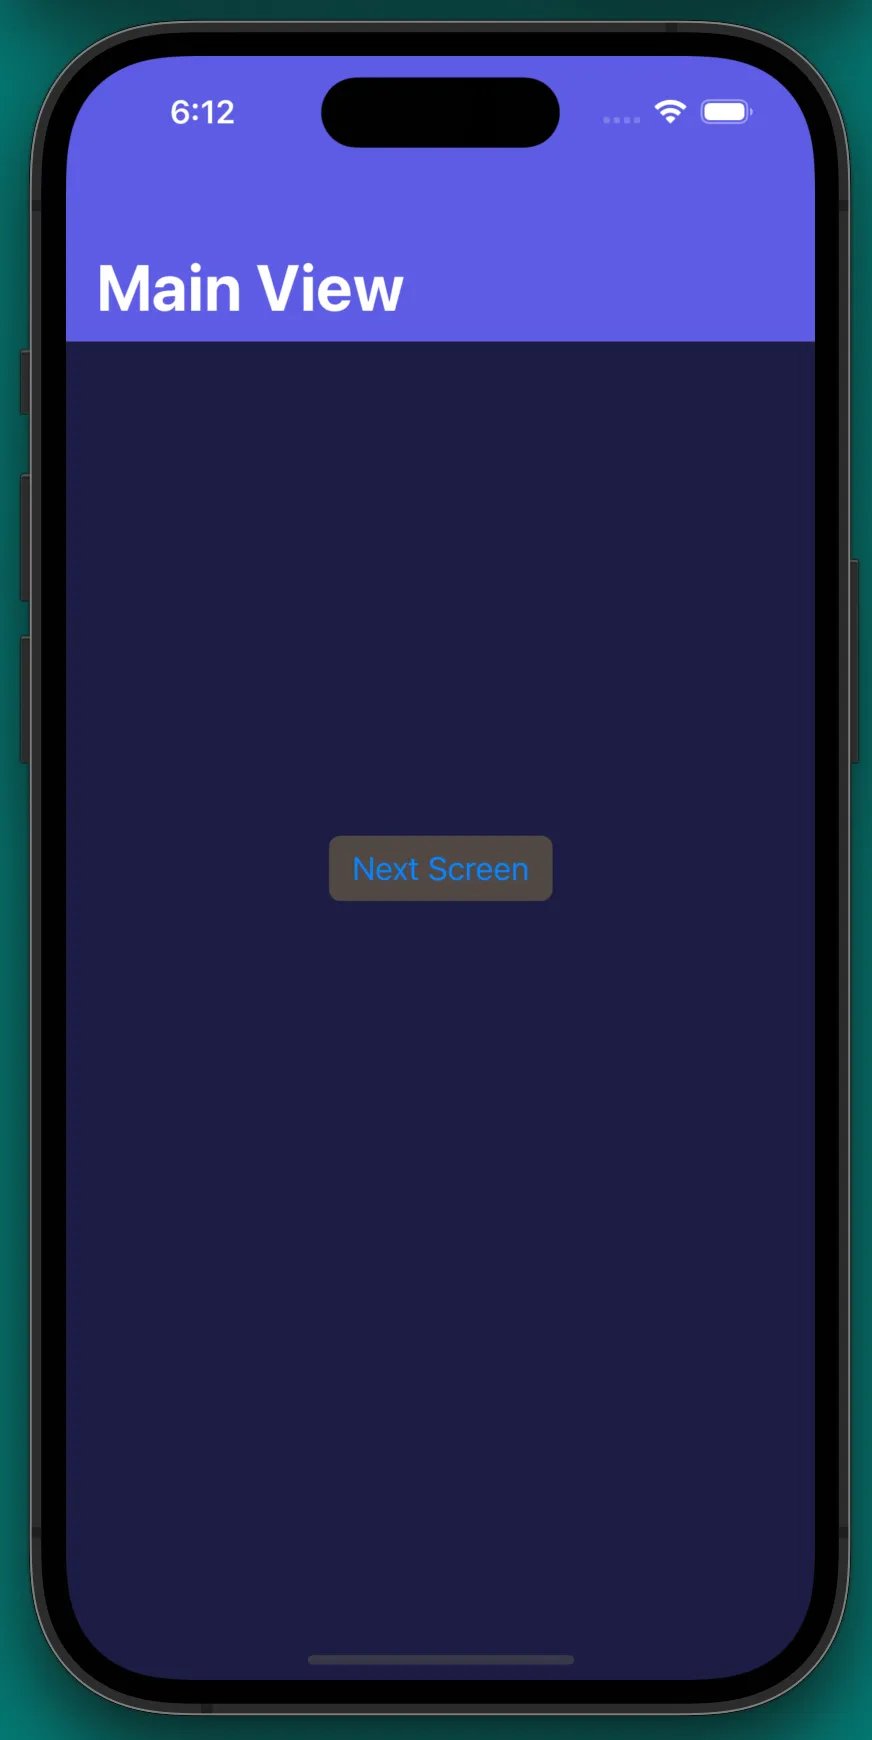
If you want to use a large title in your navigation bar, you can customize its appearance using the
largeTitleTextAttributes property of the UINavigationBar object. For example:
override func viewDidLoad() {
    super.viewDidLoad()
    view.backgroundColor = .systemIndigo.withAlphaComponent(0.3)
    title = "Main View"
    guard let navBar = navigationController?.navigationBar else {fatalError("Nav bar doesn't exit or has not been inserted yet")}

    let appearance = UINavigationBarAppearance()
    appearance.backgroundColor = .systemIndigo
    // Make the title larger and extend the nav bar
    navBar.prefersLargeTitles = true
    // Change the text color to your color of choice here
    appearance.largeTitleTextAttributes = [.foregroundColor: UIColor.green]
    navBar.standardAppearance = appearance
    // Appearance of the navigation bar when it is in a compact size,
    navBar.compactAppearance = appearance
    navBar.scrollEdgeAppearance = appearance
}
Note: The order of the code matters; appearance.backgroundColor = .systemIndigo must precede other
modification code or else it won't work.
In iOS 14 and above, you can use the compactAppearance property of the UINavigationBar
object to specify the appearance of the navigation bar when it is in a compact size. You can also use the
scrollEdgeAppearance property of the UINavigationBar object to specify the appearance
of the navigation bar when it is displayed as a scrolling edge view. A scrolling edge view is a thin strip of
the navigation bar that is displayed at the top or bottom of a scrollable content area when the user scrolls
past the edge of the content. To use the scrollEdgeAppearance property, create a
UINavigationBarAppearance object and customize its properties, such as backgroundColor
and titleTextAttributes, to specify the appearance styles you want. Then, set the
scrollEdgeAppearance to our object navBar like so:
navBar.scrollEdgeAppearance = appearance
With the code above, you will get an iPhone 14pro with a button (next screen) in the view displaying a standard navigation view with a system indigo color.

Customize Multiple NavBar in the Same Navigation Stack
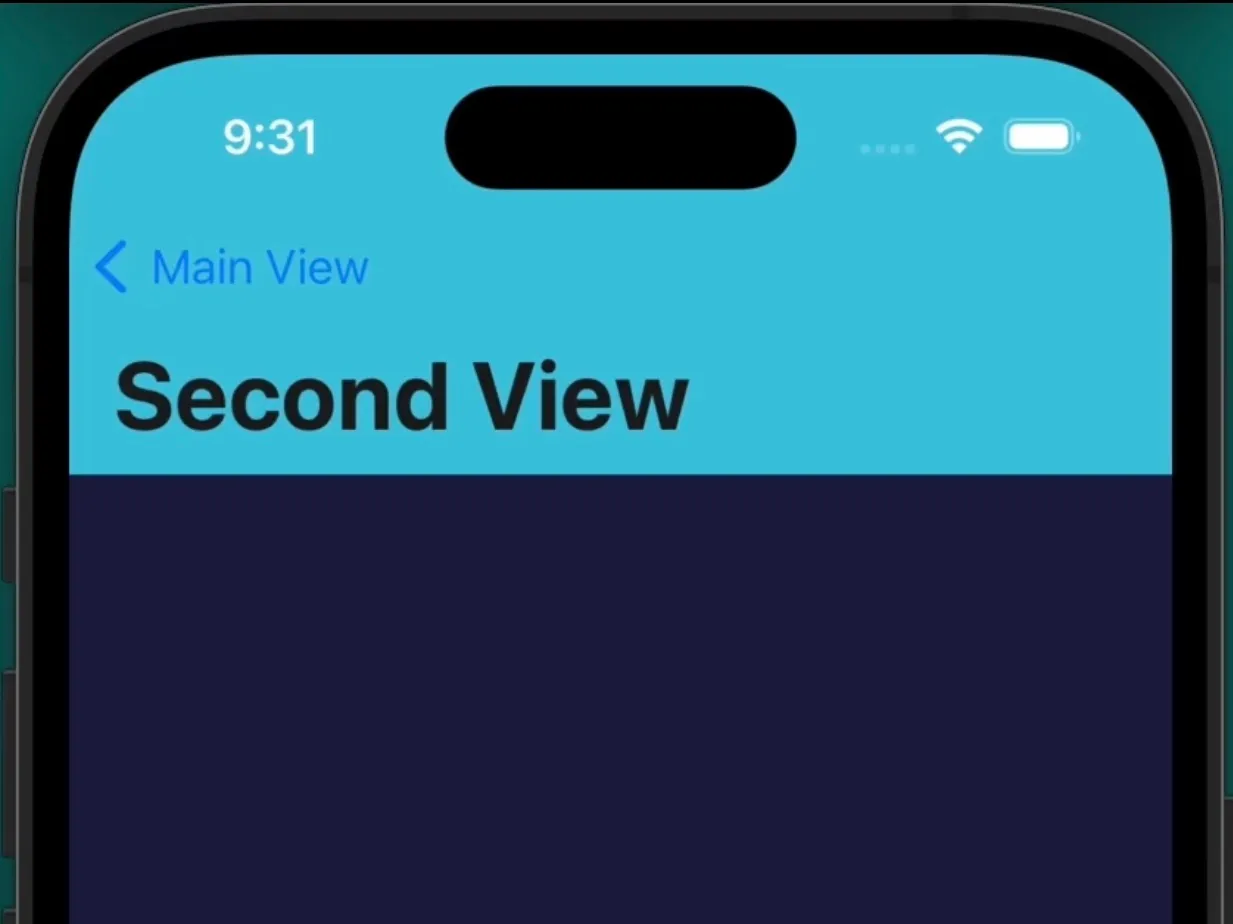
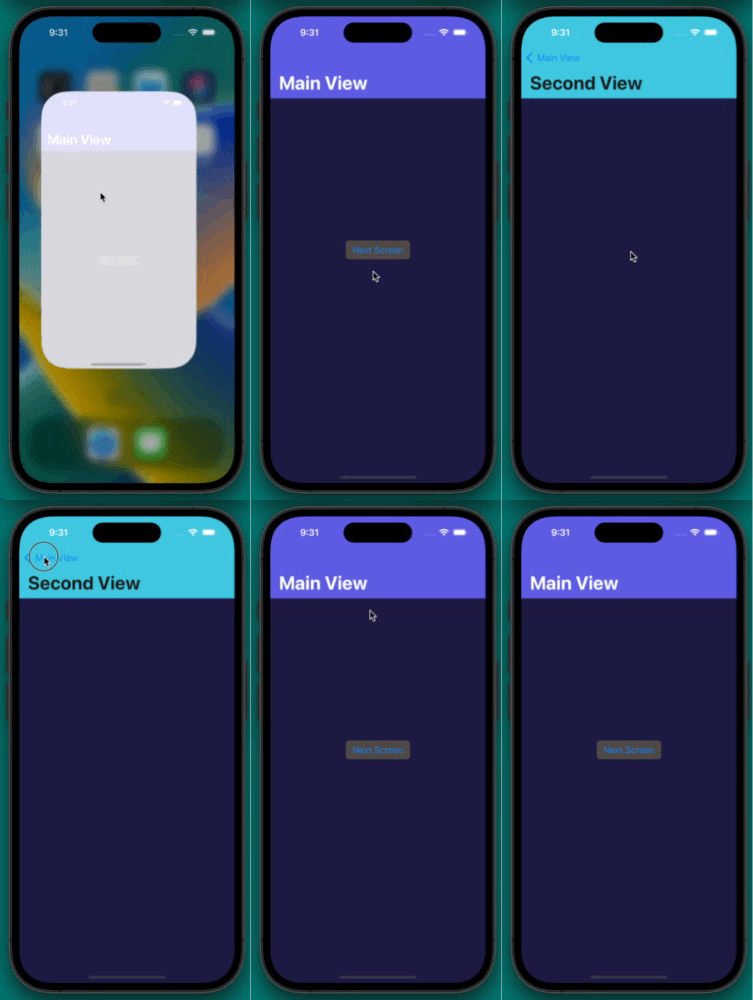
You can also customize the appearance of the navigation bar in the viewWillAppear(_:) method if you
want the appearance to be updated every time the view controller is about to be displayed. For example, you are
in the Main View, and you want to navigate/performSegue to Second View, and you want to show a dynamic navigation
bar appearance on Second View. You will modify the navigation bar appearance in the viewWillAppear(_:)
method. If you are modifying in the viewDidLoad(), your Main View navigation bar appearance will
follow whatever setup for the Second View. You may be able to perform the same task in the
viewDidLoad() method, but you cannot be sure whether or not the Second View is already
loaded/inserted into the navigation stack before the viewDidLoad() is called. If it has not been
loaded, the app will crash. Hence our code navBar. Therefore, to ensure this doesn’t happen, you
should perform this modification in viewWillAppear(_:).
guard let navBar = navigationController?.navigationBar else {fatalError("Nav bar doesn't exit or has not been inserted yet")}
override func viewWillAppear(_ animated: Bool) {
    // Put the same code when we Customize Single NavBar here
    // Do this for MainViewController and SecondViewController
}
Assuming you have push Segue is set up correctly, when clicking on the next screen button, you should get a different navigation bar appearance on each View.

Conclusion
In this article, we’ve looked at how to customize the appearance of the navigation bar in iOS 13 and above.
We’ve seen how to change the background color, title text color, and size and customize multiple navigation bars
using the UINavigationBarAppearance. We've also discussed how to customize the appearance of the
navigation bar when it is in a compact size or displayed as a scrolling edge view. With these techniques, you
should now have the tools you need to create a polished and professional-looking navigation interface in your
iOS apps.
Writer Note: That’s all for today, if this article helps you in any way, please follow me on LinkedIn and a clap would mean a lot to me. Also, post any comment if anything is not clear or missing. Thanks for reading!